

- Connect the Git provider to your workspace.
- Grant repository access in the provider, which decides what Overcut can see.
- Register the repositories you want in Overcut.
- Make them Active so they receive events and are available to projects.
Connect the Git provider
1
Open Integrations
In your workspace, open Integrations.
2
Add the provider
Select Add Provider, choose your Git provider, and complete its authorization flow. The organization or instance then appears under Integrations.
Grant provider-side repository access
Overcut can only offer repositories that the authorized account, app installation, or provider connection can access. For GitHub Cloud, this is the GitHub App’s repository access: All repositories or Only select repositories. You can change it later from the installation’s Configure page in GitHub. The same applies to GitHub Enterprise Server, using the installation on your GHES instance.Register repositories in Overcut
1
Open the connected provider
In Integrations, select the connected organization or provider instance that contains the repositories you want to add.
2
Open the repository selector
Select Add Repositories. GitLab uses its own terminology, so select Add Projects for a GitLab connection.
3
Choose repositories
Select one or more repositories. Repositories that are already registered are not listed.
4
Register the selection
Select Add Selected Repositories. For GitLab, select Add Selected Projects.
Activate repositories
Each registered repository has a separate Active or Inactive state. Open the repository under its connected provider in Integrations, then use the state control beside the repository name.- Active repositories receive events and participate in automations.
- Inactive repositories are ignored until you reactivate them.
- Only active repositories can be assigned to a project.
Choose a project’s repositories
Each project uses either every active workspace repository or a selected subset. New projects use all workspace repositories. Open Project settings, which lands on Project repositories, to see and change the project’s access.
Repository pickers inside the project, including the Playground, list only the repositories available to the project. See Multi-Project Workspaces for how this fits the project boundary.
Select repositories for a project
1
Open Project repositories
Select the project, then open Project settings. Project repositories opens first.
2
Switch to selected repositories
Select Select repositories and confirm. The project starts with every active workspace repository selected, with default settings, so nothing changes until you remove some.
3
Add repositories
Select Add repositories, search by name, and check each repository or ticket project you want. Select Add selected repositories to add them all at once. Only active workspace repositories that are not already selected are listed.
4
Remove the ones the project should not use
Select the trash icon (Remove from project) on a row and confirm.
Read the repository grid
In Selected repositories only mode, the grid lists each selected repository with what it is Used for (Code, Tickets, or both, as set in the workspace). The Events and Agent access icons show the repository’s current settings. Hover an icon to see its value.Configure Events and Agent access
Each selected repository has two independent settings:- Listen to events (on by default) controls whether the repository’s events reach this project. When it is off, the repository’s events start no workflows or orchestrations and are not delivered to running sessions or live orchestrations. Agents can still use the repository as data. This also means an agent’s own pull request or issue in that repository gets no follow-up events, such as review comments.
- Agent access controls which of the project’s workflows get access to the repository.
All workflows grants access only. It does not clone the repository into every run, and it does not add the repository’s correlated repositories. A workflow that needs the repository’s files in its workspace must still clone it.
1
Open the repository's settings
On the repository’s row, select the pencil icon (Edit repository settings).
2
Change the settings
Turn Listen to events on or off, and choose When used by the workflow or All workflows under Agent access.
3
Save
Select Save.
Remove repositories and change modes
If Selected repositories only has no repositories, the page shows No repositories selected. No repository events reach the project, and its agents cannot use any repository until you add one. Managing project repositories requires permission to edit them. Without it, you can still see the mode, the grid, and its status icons, but the mode button, Add repositories, and the row actions are hidden.Optionally enable code indexing
Code indexing gives agents a semantic search tool so they can find code by meaning rather than keywords. It is off by default. To turn it on, open the repository’s settings and turn on Enable Code Indexing.Semantic search is optional. Agents work without it using file search, grep, and glob patterns; indexing is an enhancement, not a requirement.
Troubleshoot a repository that does not appear
- Check provider-side access. Confirm that the authorized account or app installation can access the repository. For GitHub Cloud, review whether the app has access to all repositories or only selected repositories.
- Check the connection. Confirm that you opened the correct connected organization or provider instance in Integrations.
- Check whether it is already registered. The Add Repositories selector excludes registered repositories. Look for the repository under its connected provider instead.
- Check its activation state. A registered repository can still be Inactive. Open its repository page and reactivate it.
A repository is missing from a project
If a repository is registered and active but does not appear in a project’s repository pickers or the Playground, the project probably uses Selected repositories only and the repository is not selected. Add it in Project settings > Project repositories. When the Playground restores a link or history entry for a repository the project can no longer use, it clears the selection and asks you to select an available repository.A run fails before agents start
When a repository set to All workflows cannot be added to a run, the workflow fails during preparation, before any agent starts. The error names the repository, the All workflows setting, and the provider error. Check the repository’s integration and the provider-side permissions, then retry the run.Discover skills from registered repositories
Registered repositories can surface reusable skills for your team. This helps you turn repository guidance into shared project skills instead of repeating the same instructions across individual agents. When you open the project-level Skills area and choose to add a skill, Overcut lets you scan registered repositories for reusable skills your workspace can access. From there, your team can:- Browse available skills from registered repositories
- Preview a skill’s
SKILL.mdinstructions before adding it to the project - Confirm where a skill comes from so you can choose the right one for the project
Configure a repository for agent runs
Once your repository is registered, workspace admins can tailor the agent environment, instructions, and commands for that repository.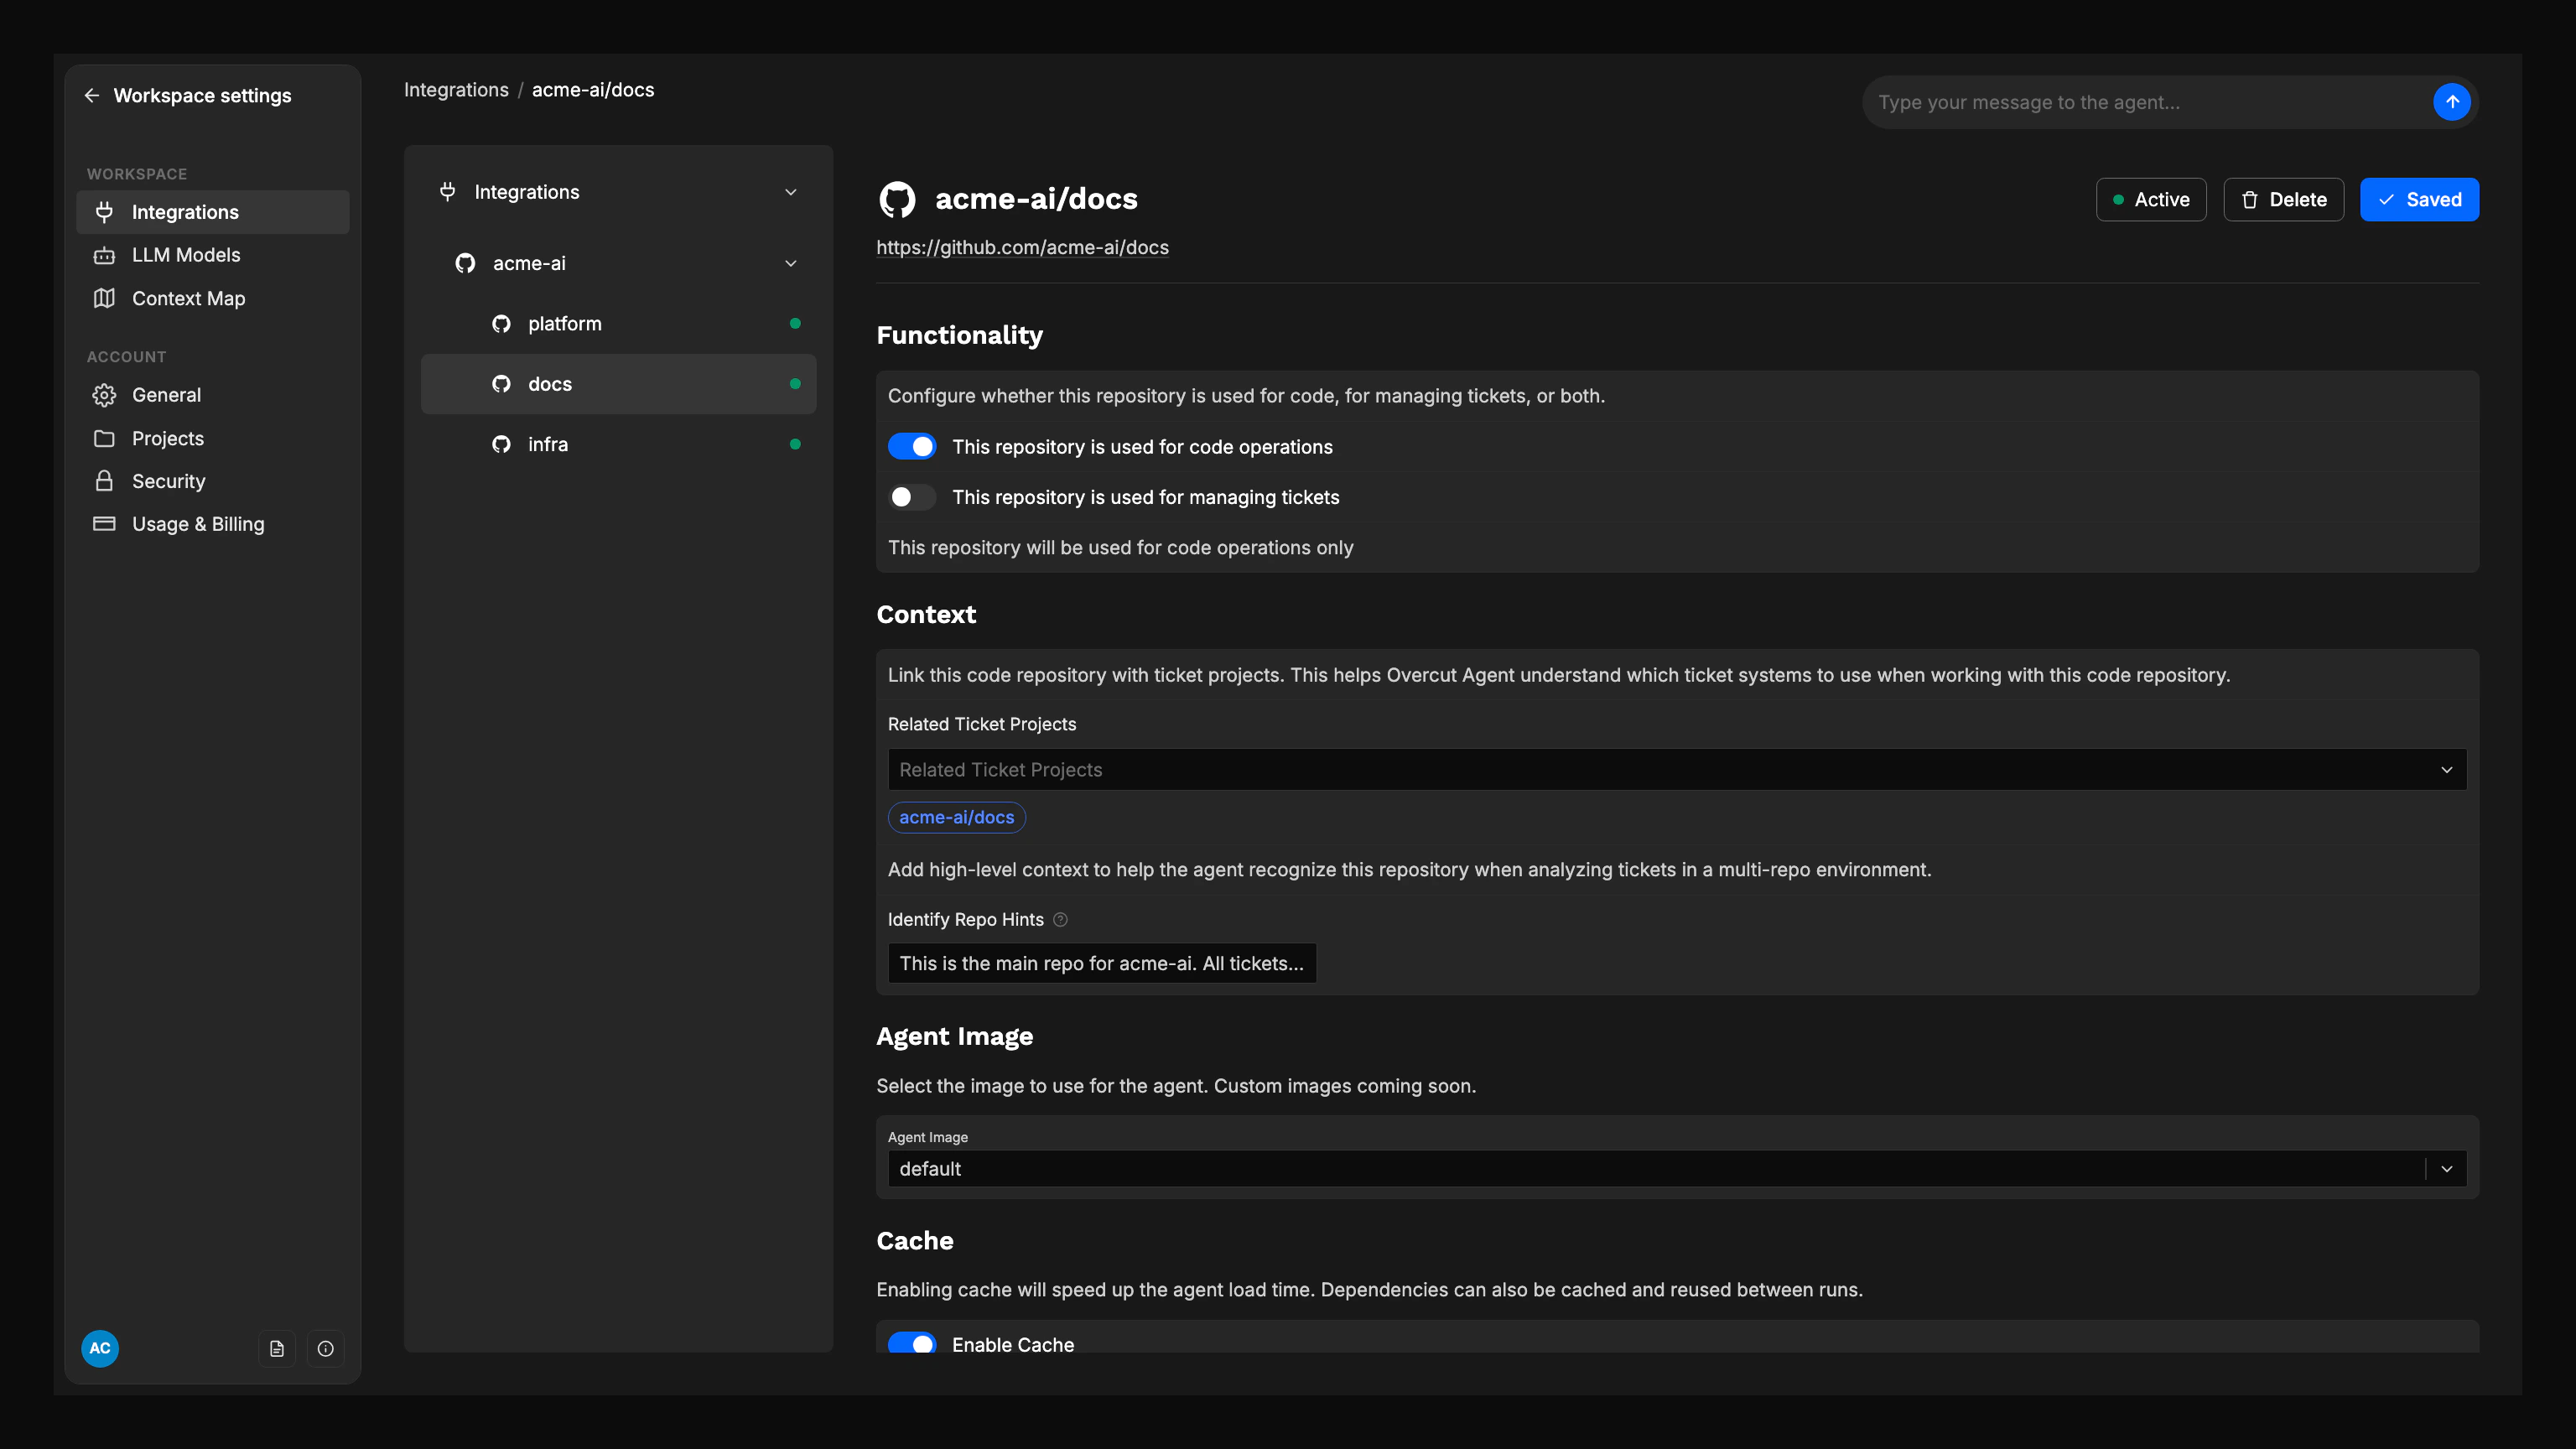
1
Open repository settings
In Integrations, open the connected provider and select the repository.
2
Choose the agent image
Select the container environment agents use for this repository. The Default Image suits most stacks, while Universal 6 provides a newer toolchain for repositories that need more recent language or runtime versions. Workspaces on an Enterprise plan can also select a custom image registered from their own registry. See Repository Agent Image for the full comparison.
3
Add custom instructions
Provide any custom workflow steps, environment setup, or compliance requirements in Markdown or YAML. Examples include pre-commit hooks, build steps, environment setup, and compliance checks.
4
Define tools and commands
Specify repository-specific commands for tasks such as install, lint, test, or build.
5
Link ticket repositories to code repositories
If your workspace uses ticket repositories, link them to related code repositories from the ticket repository page. See Repository Mapping for details.
6
Set repository values for context parameters
Use the repository’s Context Parameters panel to set values that runs on this repository should use. See Context Parameters.
7
Save your configuration
Save your changes to apply the configuration.