The hierarchy
Every building block belongs to one of three layers:
A workspace can contain one project or many. The split exists so each scope of work runs against a narrow harness with its own credentials and audit trail, while integrations, models, and team membership stay shared. For the full breakdown, see Multi-Project Workspaces.
Workspace
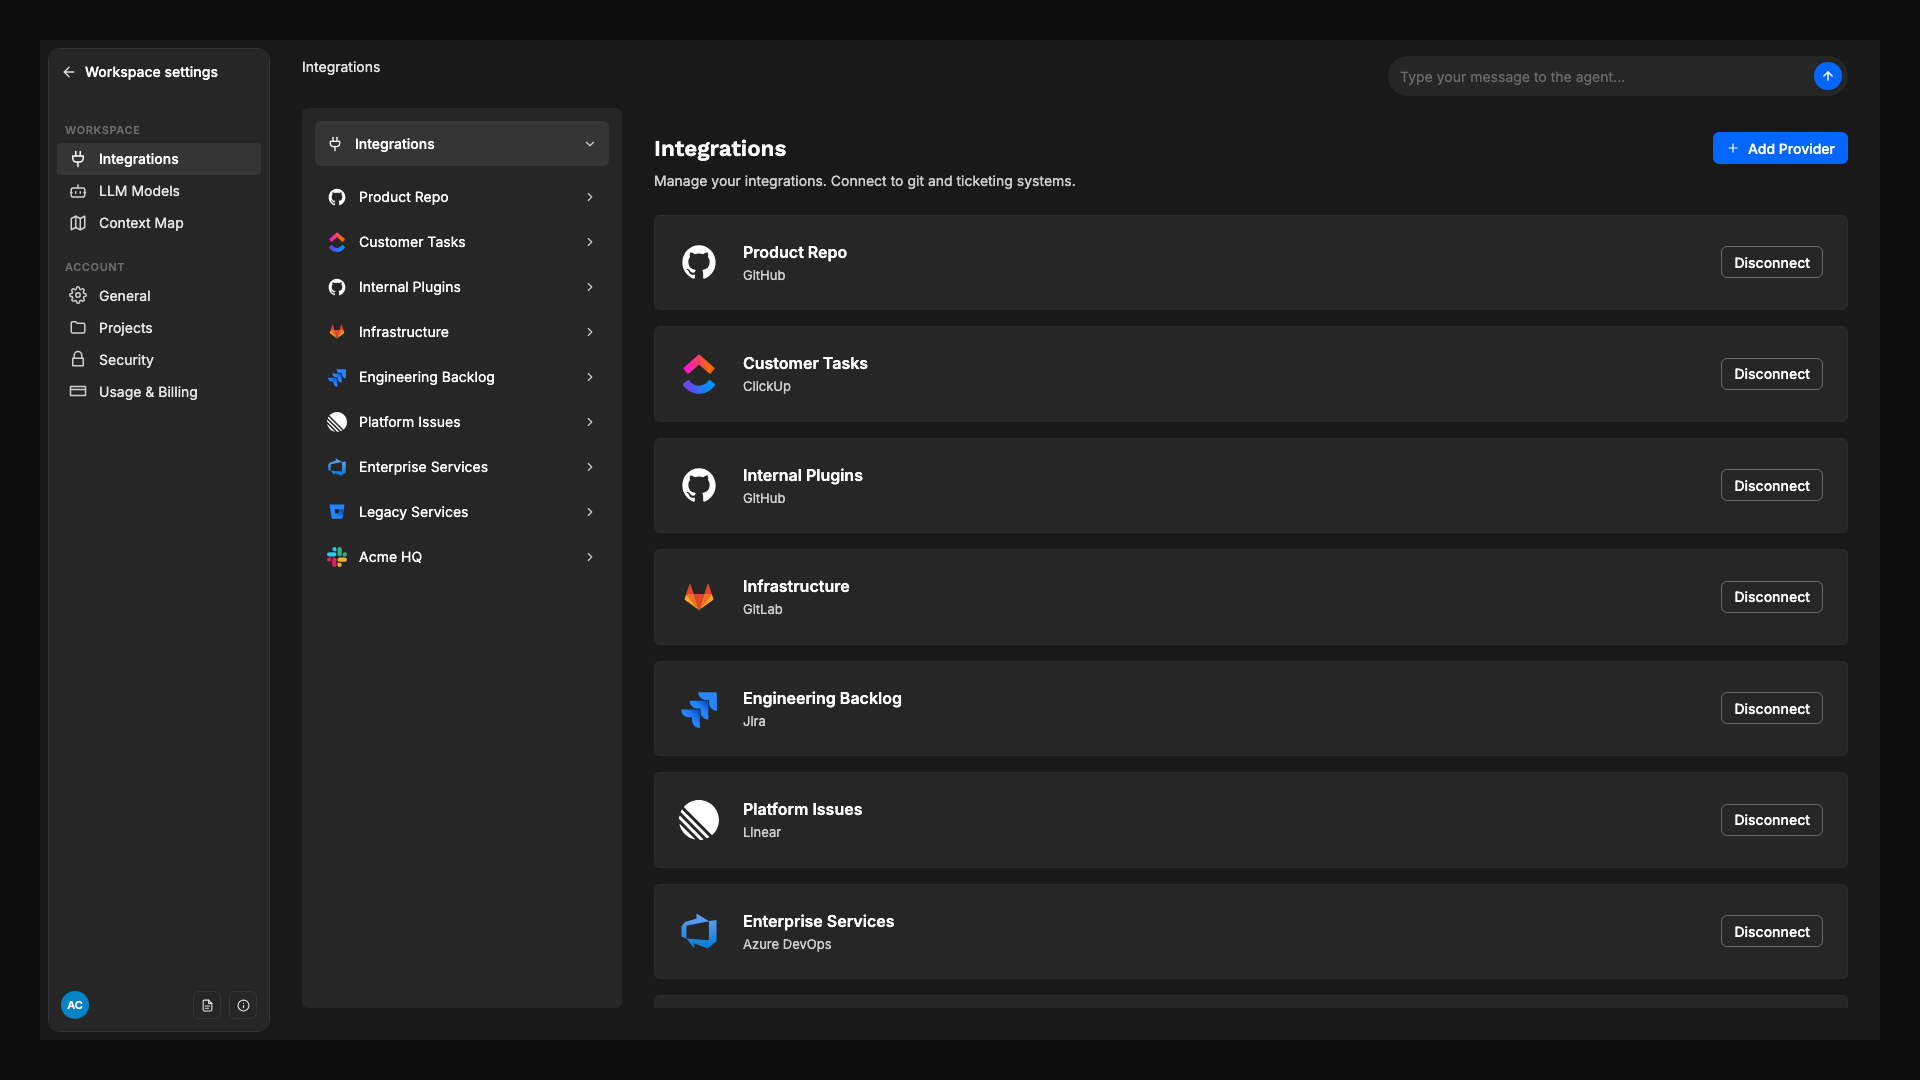
The workspace is the top-level container. It holds everything that should be configured once for the whole organization.- Integrations: OAuth connections to GitHub, GitLab, Azure DevOps, Bitbucket, Jira, Linear, ClickUp, and Slack. See the Integrations overview.
- LLM Models: which models are available to projects, and the workspace default. See LLM Models.
- Teams, Roles, Users: who has access, and at what permission level.
- Workspace Secrets: platform-wide credentials such as the Claude API key.
Project
A project is the unit of work and ownership. It bundles the agent harness for one scope (one product, one environment, one customer) and the team that runs it. Each project has its own:- Repositories it is allowed to read from and act on
- Project Channels (the Slack channels it can post to and be triggered from)
- Agent Roles, Skills, and MCP Servers that define what its agents can do
- Project Vault for project-scoped secrets
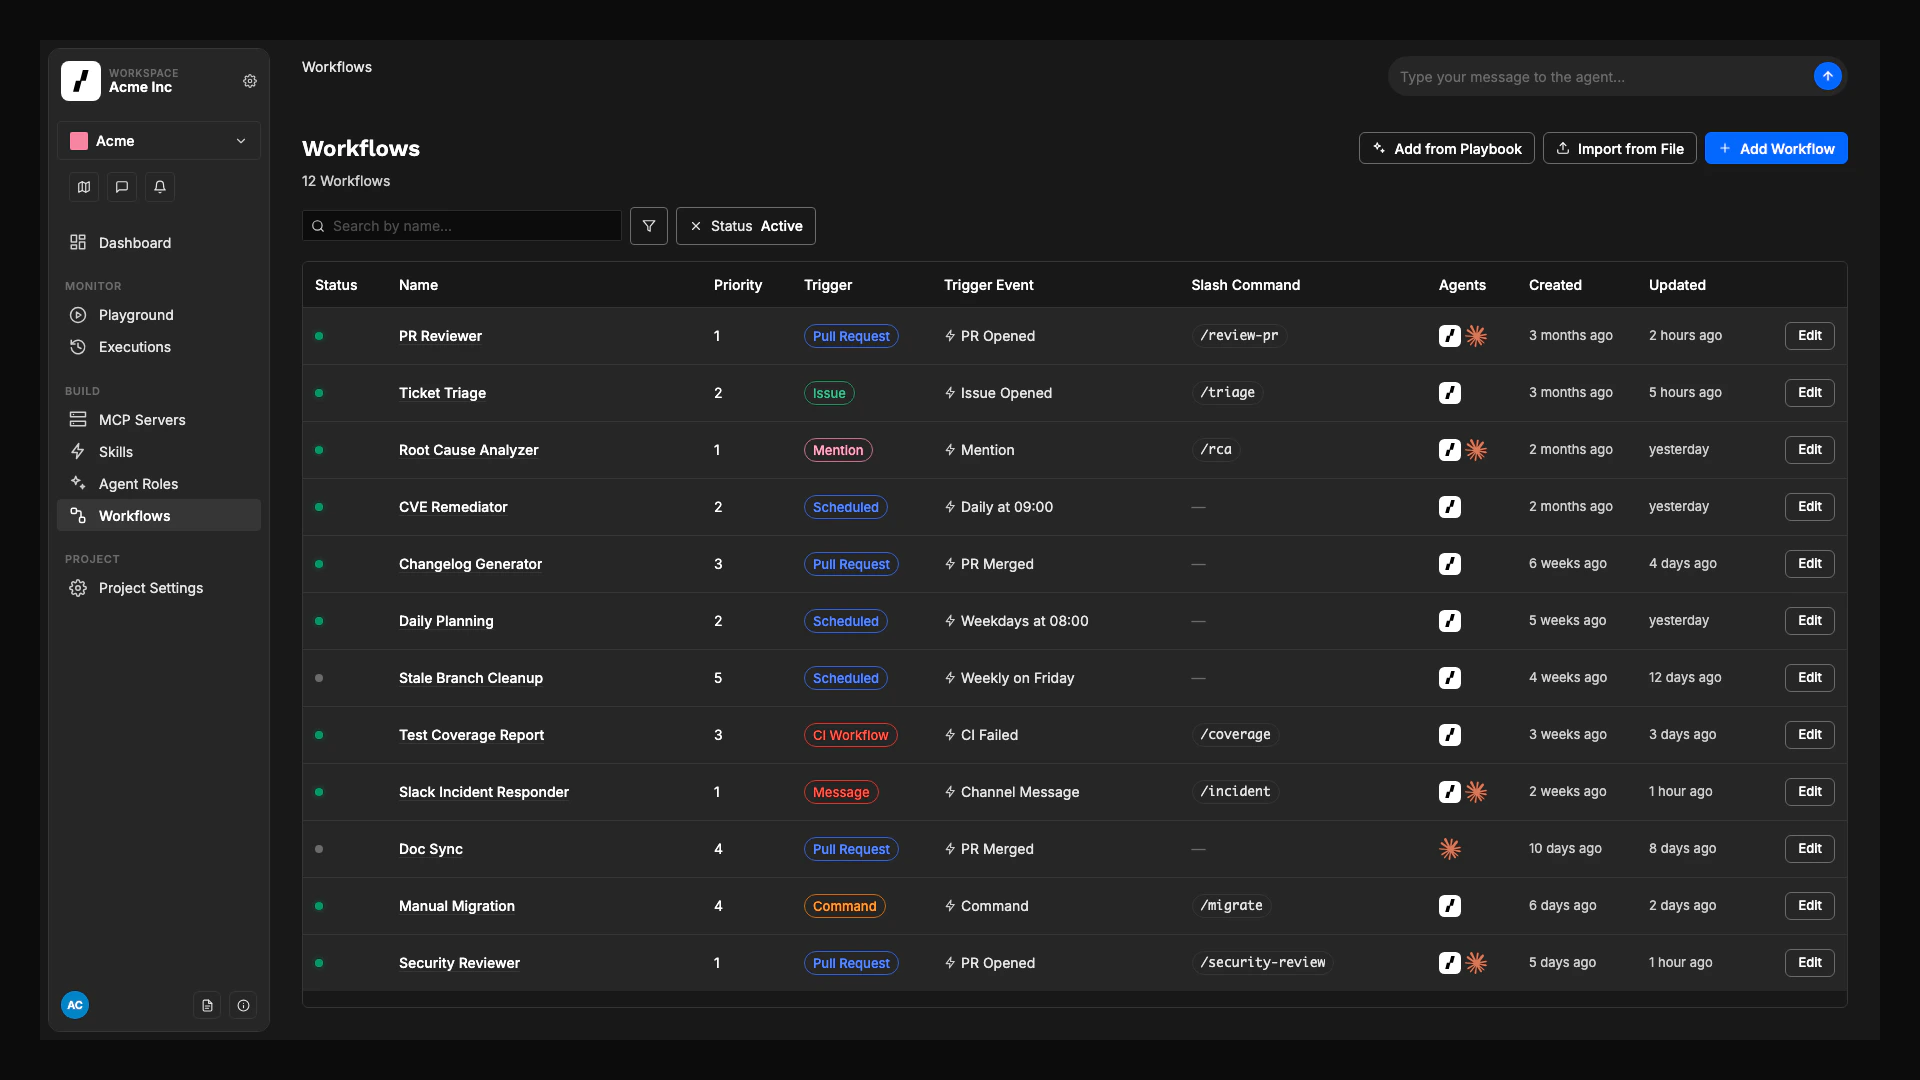
- Workflows and their Executions
The agent harness
The harness is the set of resources, inside a project, that an agent can see and call. A narrow harness produces sharper, more predictable runs than a wide one. The harness is composed of six building blocks.Repositories
Repositories are connected at the workspace level, then granted to each project. A project either uses every workspace repository or a chosen subset (the Allow access to all repositories toggle on Project Settings → Project Repositories). Beyond raw access, repositories carry three pieces of metadata that make them useful at runtime:- Repository Mapping: which repositories a given ticket relates to, so the
repo.identifyaction can pick the right code for the work. - Repository Caching: pre-cloned repositories on the runner so workflows start fast.
- Repository Indexing: semantic code search so agents find relevant context without scanning the tree.
Integrations
Integrations are the OAuth connections that let Overcut listen to events and act through provider APIs. They are configured once at the workspace level, then exposed to projects through repositories and channels.
Agent tools are provider-agnostic. An instruction like “open a pull request” or “create a ticket” works across every connected integration without changing the agent. See the Agent Tools Reference.
Channels
A channel is a Slack channel that a specific project is allowed to use. Channels are registered on Project Settings → Project Channels and each one has a routing mode:- Interactive: only
@overcutmentions and/overcutslash commands start workflows. - Active: every top-level channel message is also a trigger event. Useful for incident channels, alert channels, and routing on bot posts.
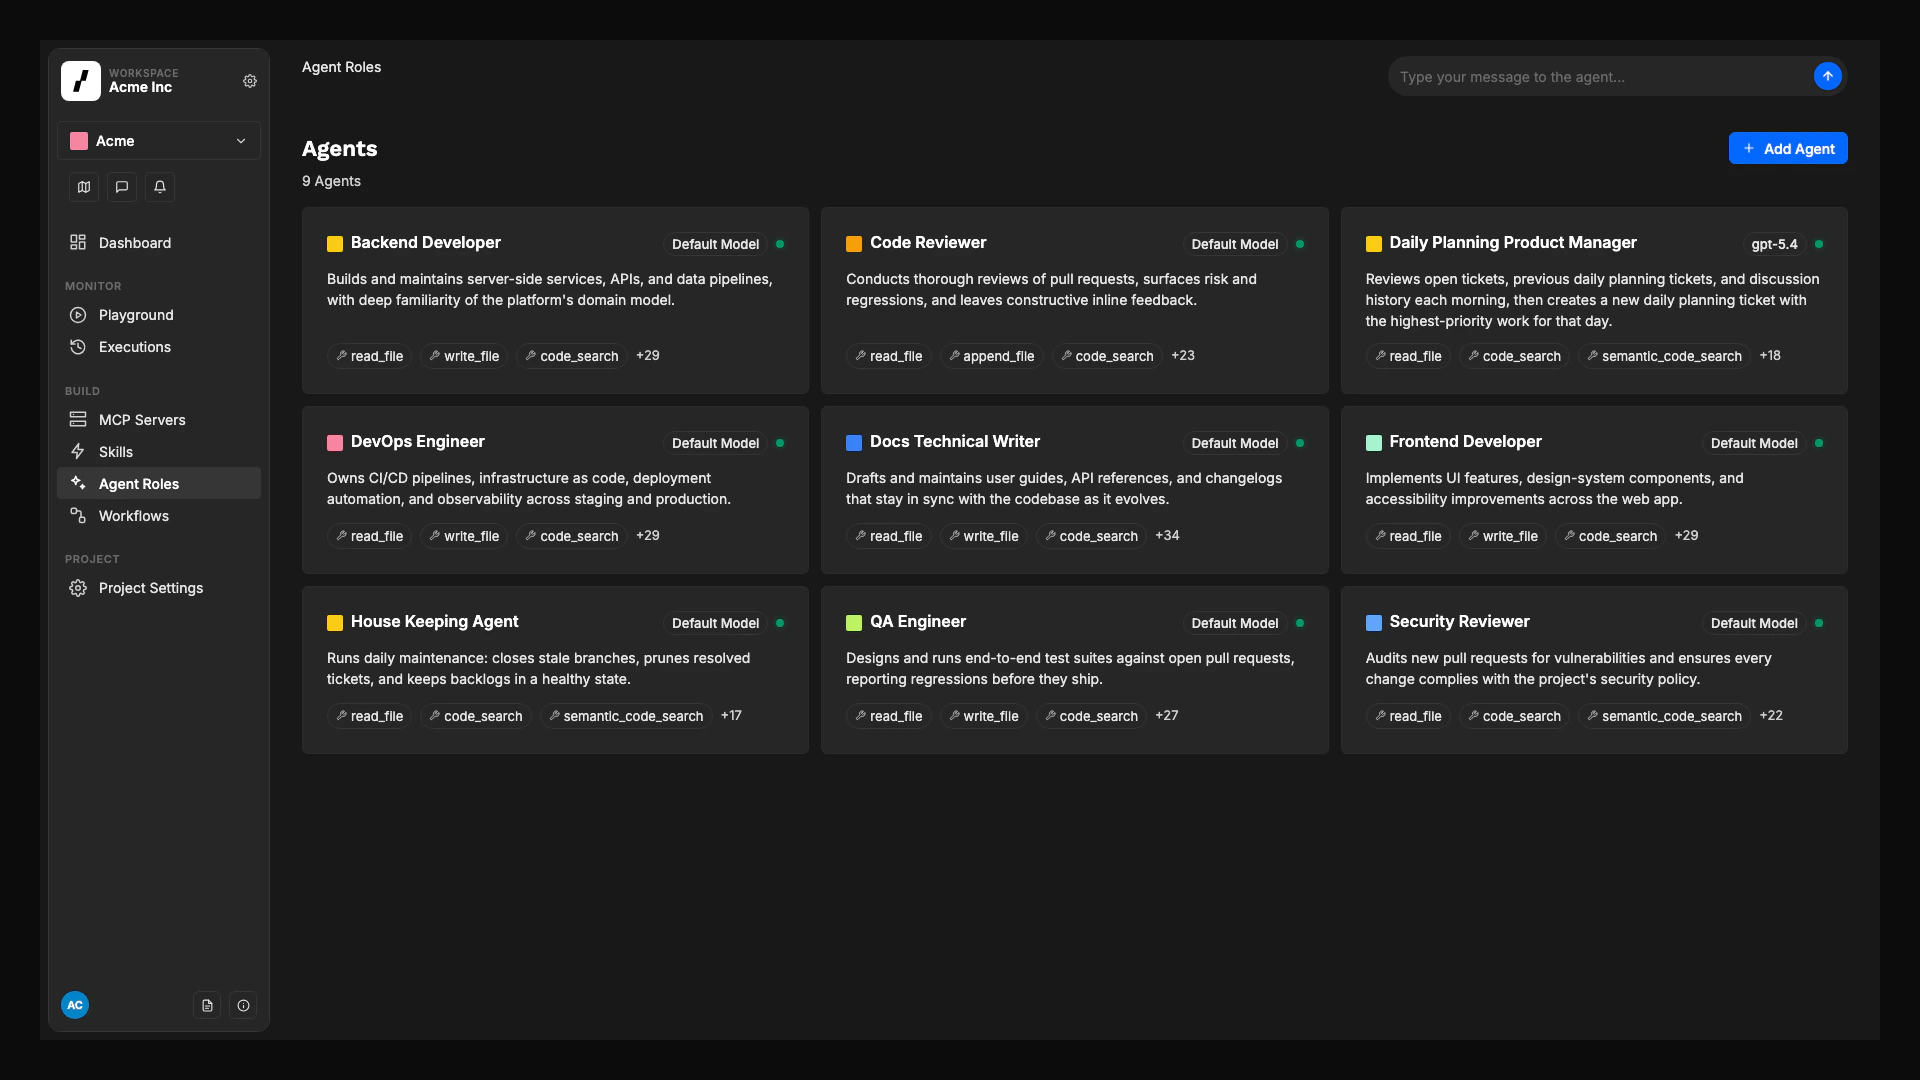
Agent Roles
An agent role is a reusable AI worker. Each role is built on one of five base agent types, which determine its default toolset and built-in role instructions:
You extend a base type with additional instructions, extra tools, MCP servers, and skills to produce specialized agents (for example, a “Backend Developer” and a “Frontend Developer”, both built on Senior Developer). See Base Agent Types.
Agent roles are project-scoped. Each role lives in exactly one project’s harness.
Skills
A skill is a reusable set of instructions that lives in one of your connected repositories, packaged in the open Agent Skills format. After a skill is added to a project, you assign it to the agent roles that should follow it. Skills are the right place for guidance that should be authored once and applied consistently: framework conventions, review checklists, escalation rules, naming standards. Keeping them in a repository means they version with the code they describe. See Skills.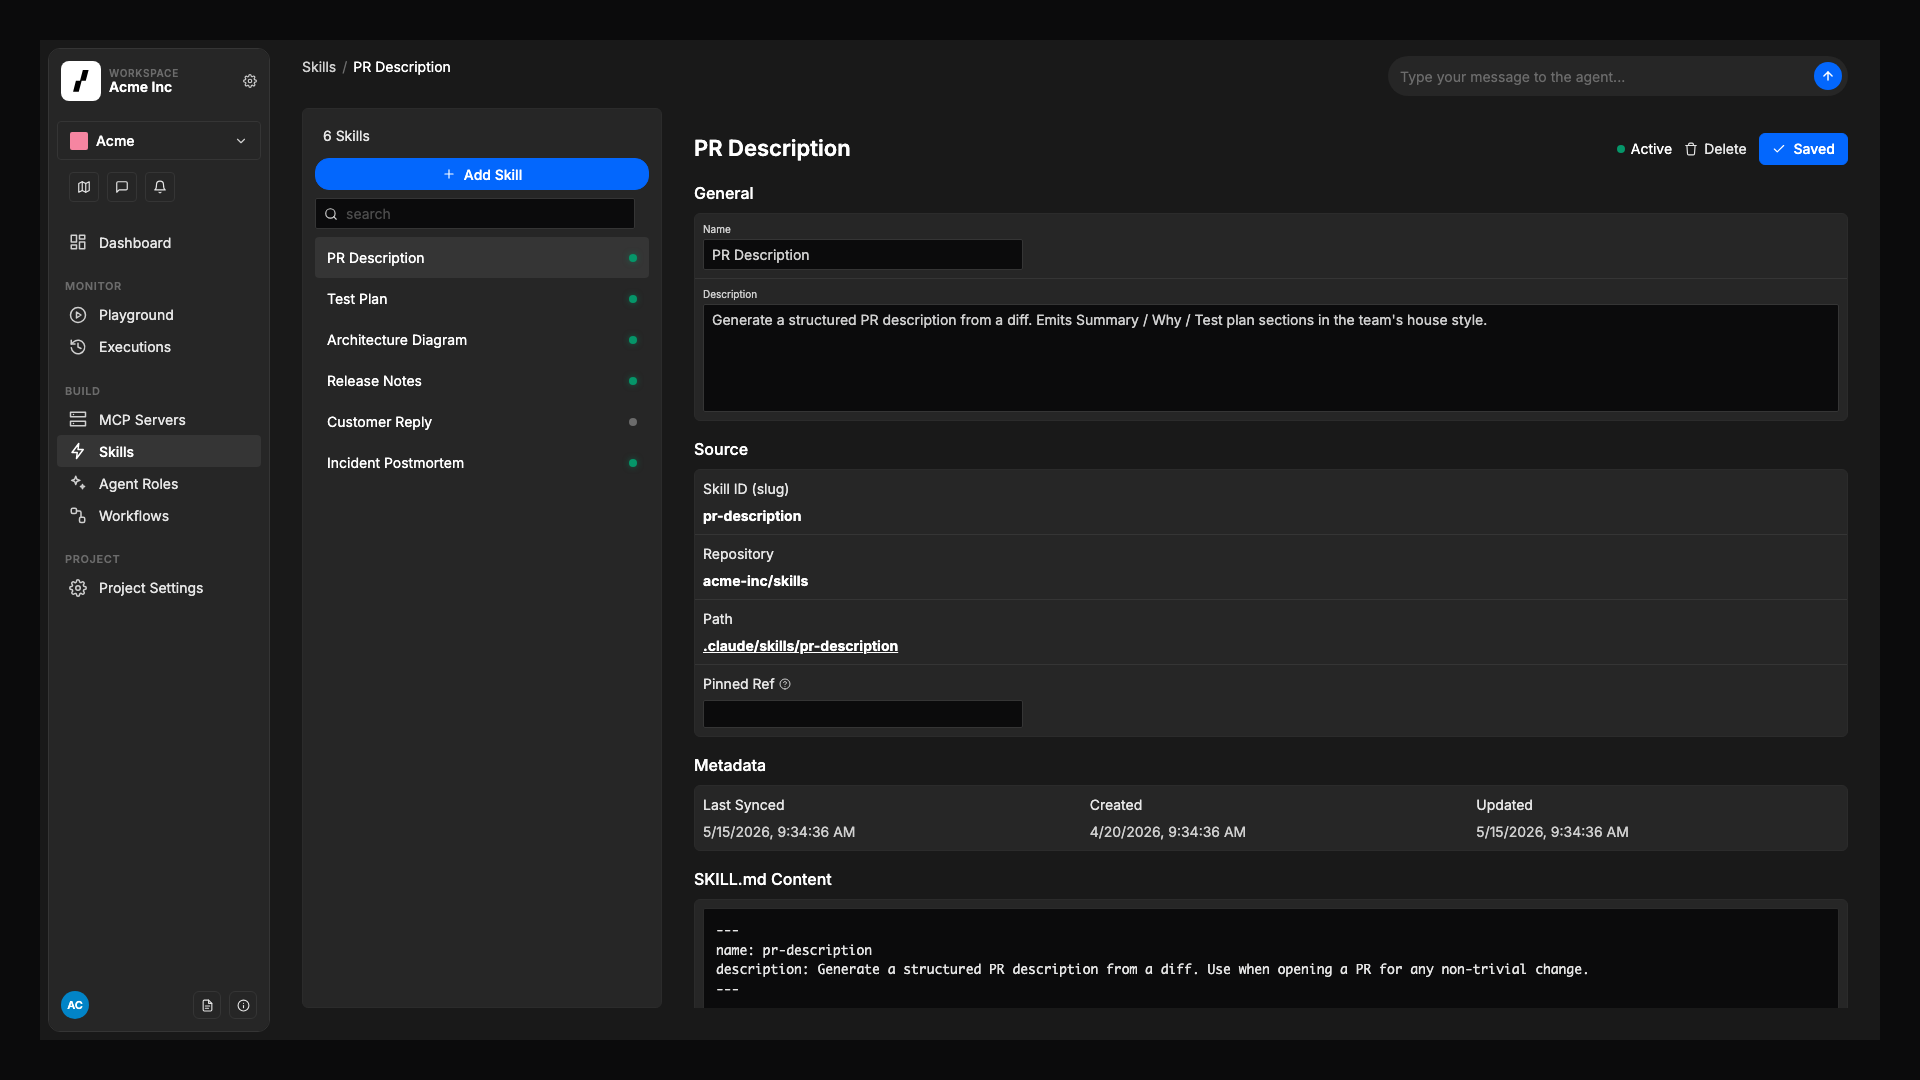
MCP Servers
MCP Servers give agents access to external tools through the Model Context Protocol: a database, an internal API, a third-party service, a custom toolset. Install common servers with one click from the MCP Catalog, or configure a custom server. Each server can be assigned to specific agent roles, and you can restrict which of its tools an agent is allowed to call. See MCP Servers.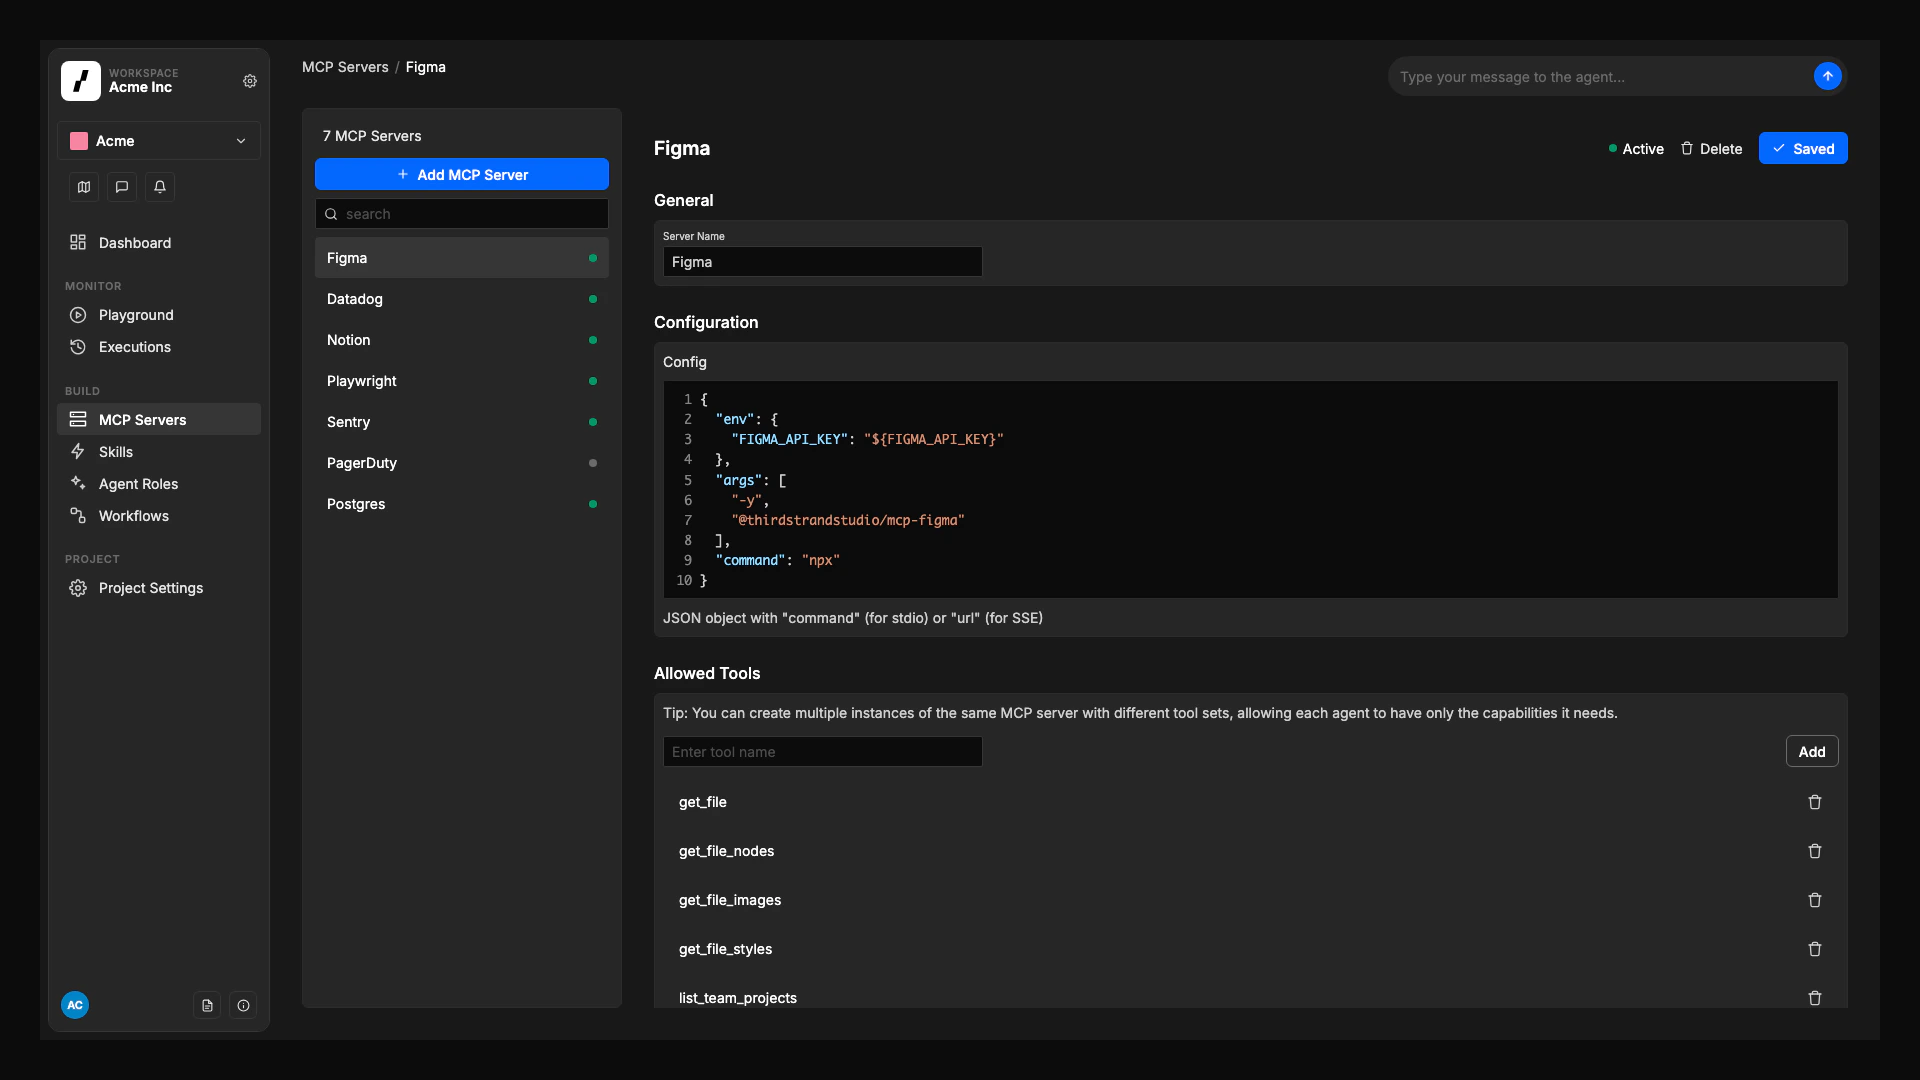
Project Vault
The Project Vault stores credentials that workflows, agents, and MCP servers need at execution time: API keys, tokens, database passwords. Secrets are encrypted at rest, injected into the execution sandbox as environment variables, and never sent to the LLM. See Vault. The Project Vault is distinct from Workspace Secrets, which holds platform-wide credentials like the Claude API key.Workflows
A workflow is one orchestration: a graph that turns an event into an outcome (a reviewed PR, a drafted spec, a triaged ticket, a resolved incident). Workflows live inside a project, and every workflow has one trigger and one or more steps.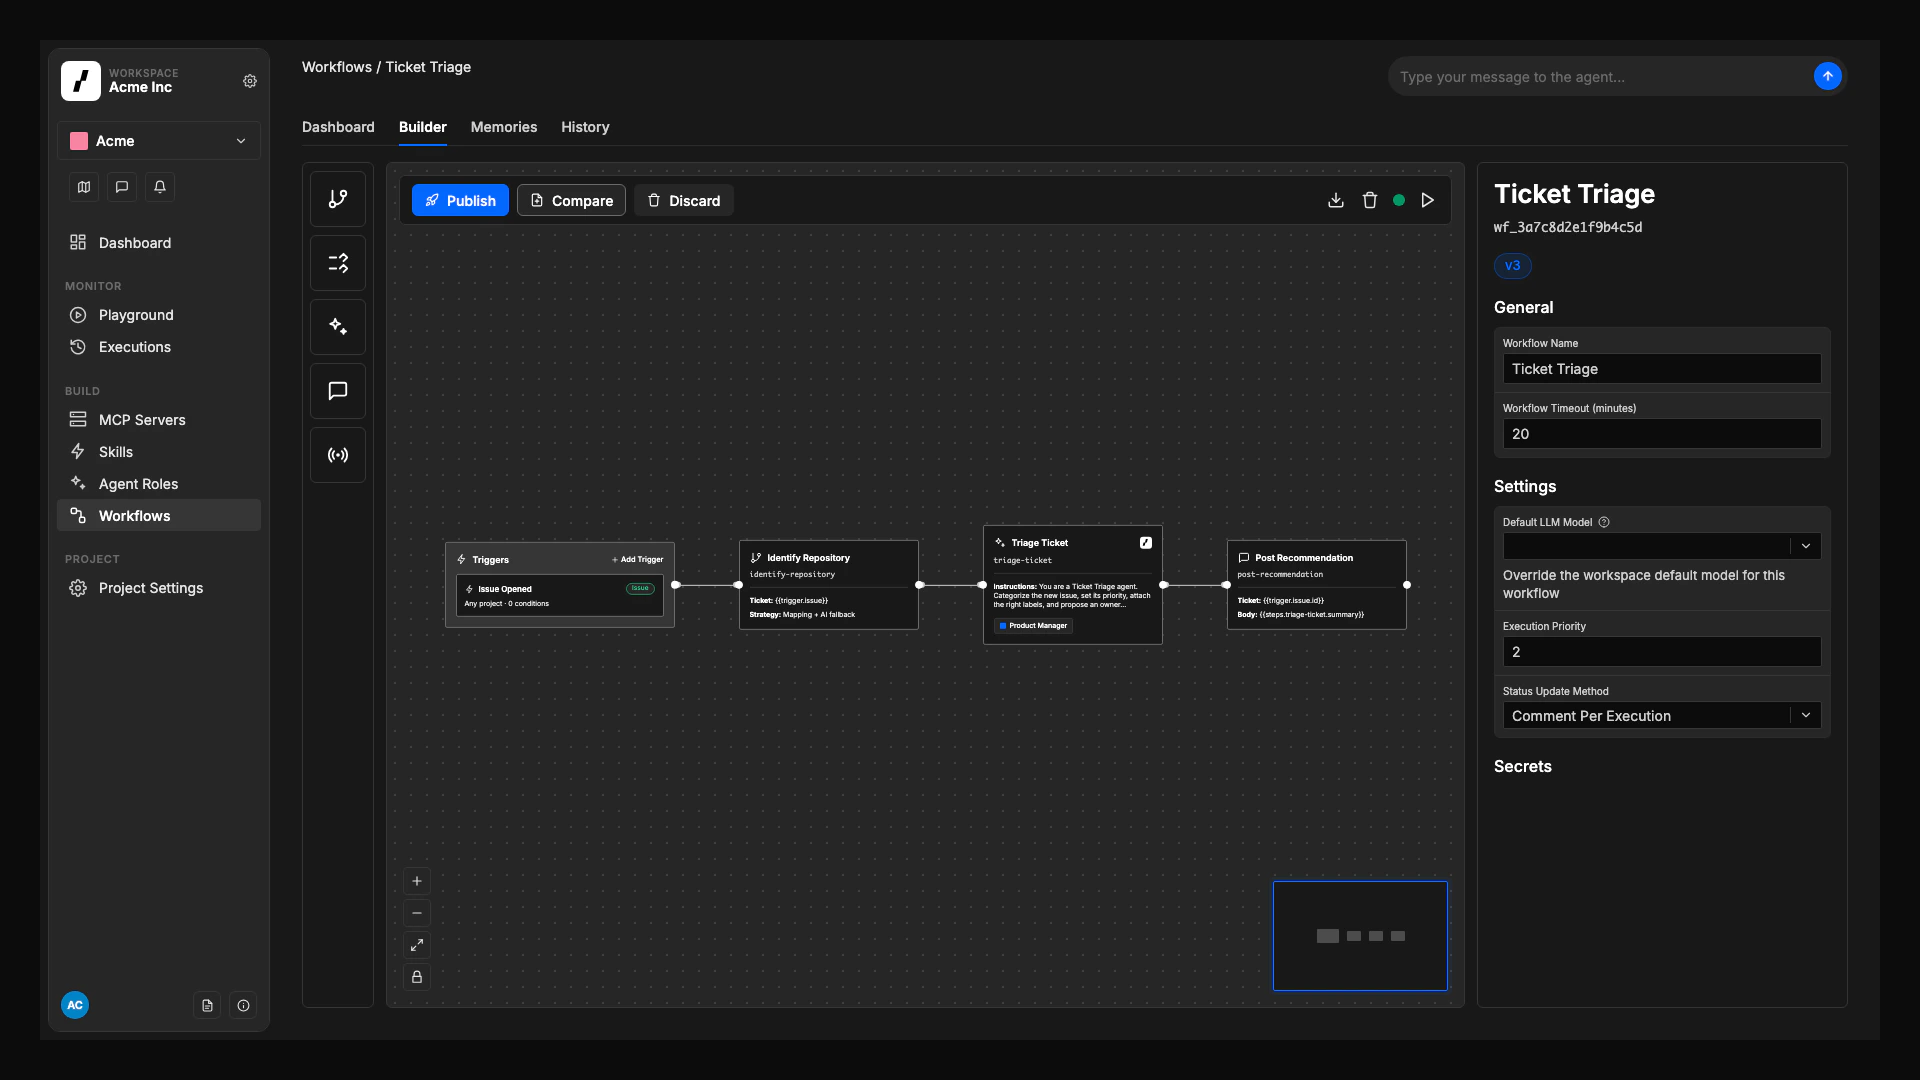
@overcut mention or /overcut slash command on any PR, ticket, or Slack channel. Events are normalized across providers, so one workflow can react to GitHub, GitLab, or Bitbucket without conditional logic. See Triggers.
A step is one operation in the graph. Some steps are deterministic (git.clone, repo.identify, script.run, ci.executeWorkflow). Use Run Script for repeatable inline bash commands that should run in the workflow execution container without an AI agent. Other steps run an agent: agent.run for a focused task, agent.session for an interactive conversation. Outputs from one step flow into the next.
Every workflow has a published history and an auto-saved draft, so you can compare versions and restore an earlier definition without losing in-progress edits. See Workflow Version History.
Runtime
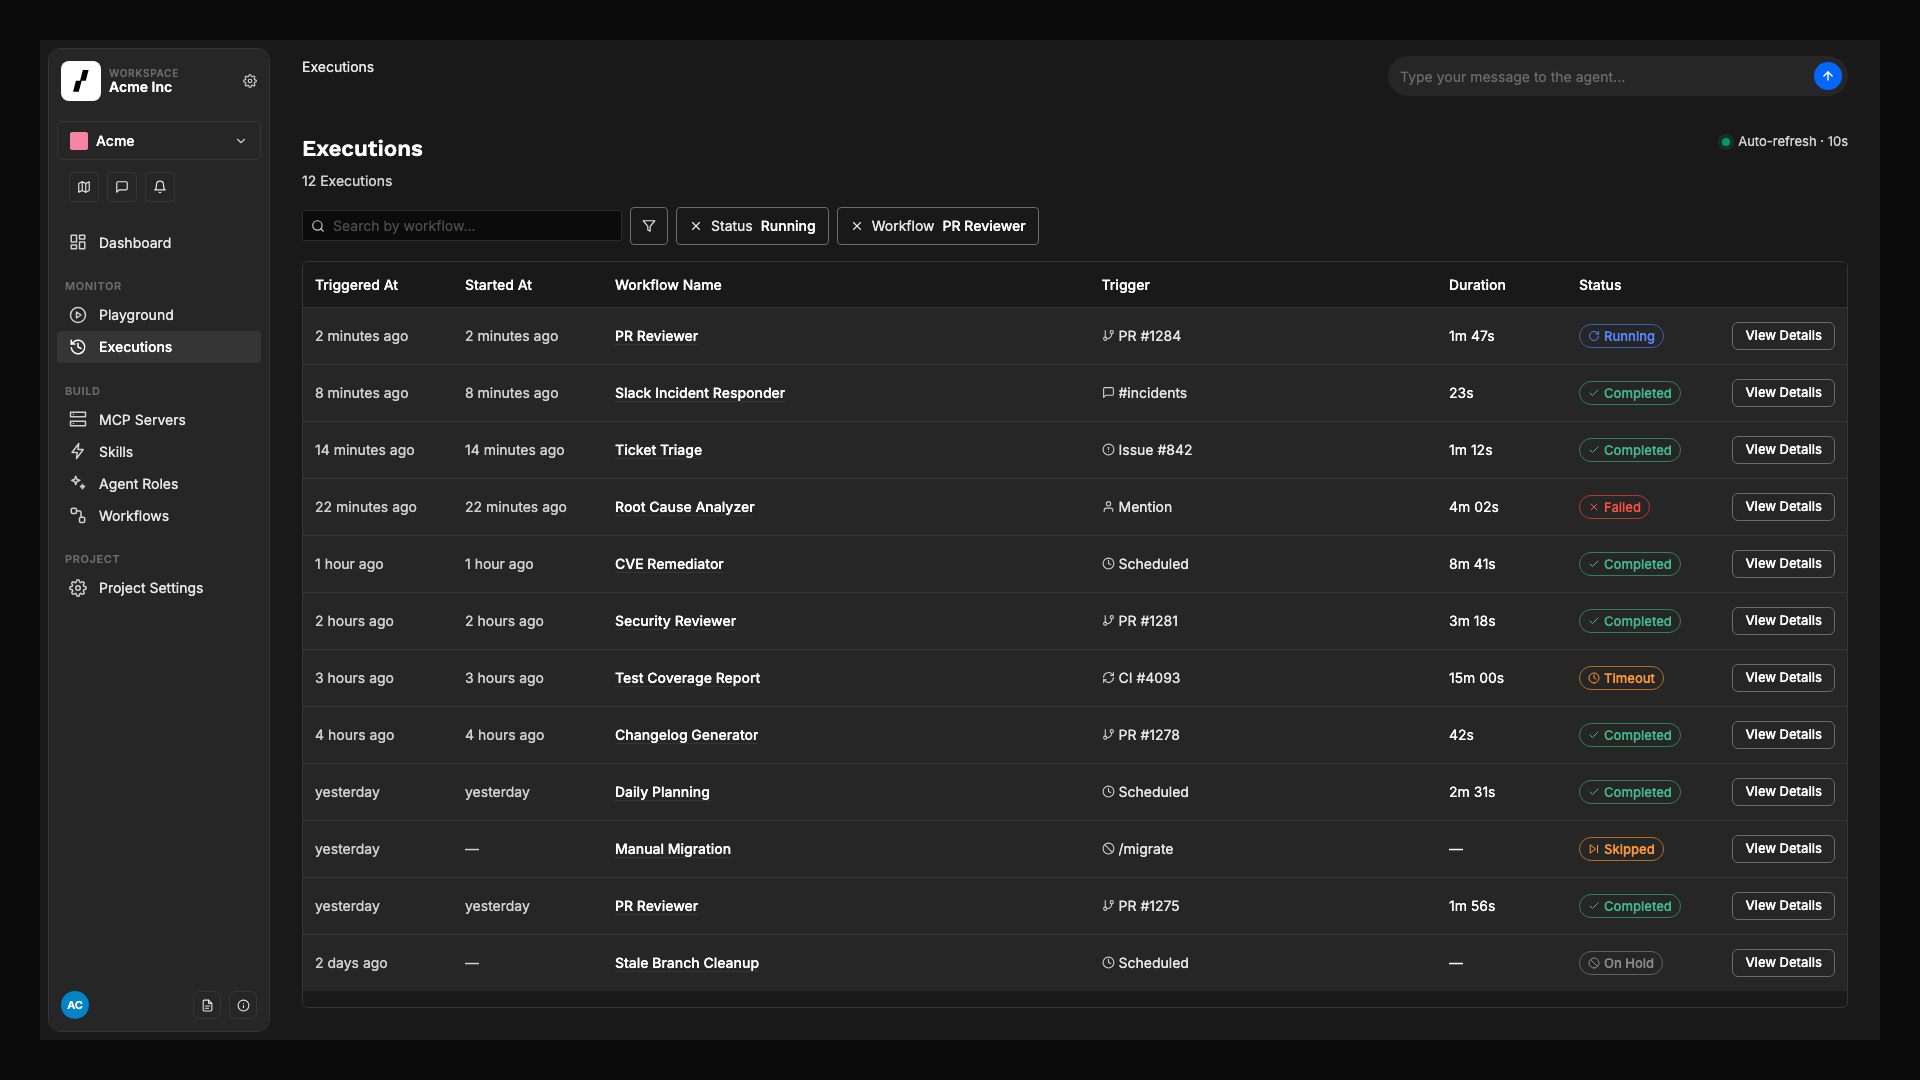
These building blocks only exist while a workflow is running, or once it has finished.Executions
An execution is one run of a workflow: the trigger event, the path through the graph, every step’s input and output, and the agent’s chain of reasoning. Executions are visible from the project’s Executions page in real time. Overcut coordinates concurrent runs so they don’t fight over the same resource:- Resource locking: only one workflow runs against a given issue, PR, or repository at a time.
- Priority queuing: a 1 to 100 scale (lower runs first) when several workflows target the same resource.
- Event deduplication: rapid-fire events on the same resource merge while queued.
Interactive sessions
An interactive session is an ongoing conversation between users and an agent that started withagent.session. Comments on the originating PR, issue, or Slack thread route directly into the live session instead of starting a new workflow, so context is preserved. Sessions end on a keyword, a timeout, or a slash command interrupt. Cleanup behavior is covered in Session Cleanup.
Memories
A memory is a piece of knowledge that survives between runs of the same workflow: a coding convention, a recurring issue pattern, a decision made earlier. Agents read and write memories automatically during a run; no extra setup is required. Memories are scoped to one workflow, so each workflow builds its own institutional knowledge. See Workflow Memory.Self-improvement
Workflows get sharper over time through retrospectives: automated reviews that look at recent executions, identify patterns, promote tentative findings into active memories, and adjust the weight of existing ones. Retrospectives run when Auto-Improve Workflows is enabled at the workspace level and the workflow has retrospectives configured in its Self-Improvement panel. See Workflow Self-Improvement.Monitoring
Every step of every execution streams structured logs, inputs, and outputs to the Executions page and the project Dashboard. From there you can replay a step, inspect what an agent saw, and follow links back to the PR, ticket, or Slack message that triggered the run.How the blocks compose
Reading these in order, the full path of one automation is:- A user, a service, or a clock fires an event that matches a trigger in a workflow.
- Overcut checks project scope (repositories, channels, vault) and queues the execution.
- Actions run in order. Some are deterministic (
git.clone,repo.identify,script.run,ci.executeWorkflow). Some hand off to an agent role, which uses its base type, skills, MCP servers, and the project’s tools to do the work. - The agent reads and writes memories, posts back to the originating PR, ticket, or Slack thread, and (optionally) opens an interactive session for follow-up comments.
- The execution is recorded, surfaced in monitoring, and made eligible for the next retrospective.
Where to go next
- New to the platform: start with the Quick Starts and Playbooks.
- Designing a new workflow: open the Workflow Builder guide.
- Shaping a project’s harness: read Multi-Project Workspaces and Base Agent Types.
- Connecting tools: browse the Integrations overview and the MCP Catalog.