> ## Documentation Index
> Fetch the complete documentation index at: https://docs.overcut.ai/llms.txt
> Use this file to discover all available pages before exploring further.
# Repositories
> How Overcut uses repositories, scopes automation, and enables per-repo customization for optimal agent performance.
## Repositories as the Foundation of Overcut Automation
In Overcut, repositories are the primary units for automation. All workflows, triggers, and agent actions are scoped to the repositories you connect and activate in your workspace.
Connected repositories also make repository-backed skills available for discovery in your project. When a repository is connected, Overcut can surface reusable skills that teams can review and add in the project-level **Skills** area.
## Repository Scope: Which Events Are Processed?
* **Only events from active repositories are processed.**
* When you connect a repository to Overcut (via **Settings → Integrations → Git**), you define the scope for all automations.
* Overcut listens for events (pull requests, issues, pushes, etc.) **only** from these active repositories.
* This ensures that automations run only where you intend, and that agents have access to the right code and context.
Inactive or unconnected repositories are ignored by Overcut. To automate a new repo, connect and activate it in your workspace settings.
## Register a new Git Organization
To start automating with a new git, you must first register the organization.
From the main menu click on **Git Integration**.
Click on **Connect Git Provider**.
Select the Git provider you want to connect. (GitHub, GitLab, etc.) and click on **Connect**.
You'll be redirected to GitHub to grant Overcut the necessary permissions for a specific organization or account.
After selecting your preferred account or organization, you'll be led to the configuration page. You can configure the GitHub App to only allow access specific repositories in your account, or allow Overcut to access all of your repositories.
## Adding a New Repository to Overcut
To start automating with a new repository, follow these steps:
From the main menu click on **Git Integration**.
Click on the organization you want to add a repo from.
Click **Add Repository**.
From the modal, select the repository you want to add. Only repositories with access permissions will be shown.
Confirm and save your changes.
Only repositories that are connected and active will be included in Overcut automations and skill discovery.
## Discover skills from connected repositories
Connected repositories can surface reusable skills for your team. This helps you turn repository guidance into shared project skills instead of repeating the same instructions across individual agents.
When you open the project-level **Skills** area and choose to add a skill, Overcut lets you scan connected repositories for reusable skills your workspace can access. From there, your team can:
* Browse available skills from connected repositories
* Preview a skill's `SKILL.md` instructions before adding it to the project
* Confirm where a skill comes from so you can choose the right one for the project
This keeps repository access and skill discovery aligned. If a repository is not connected to your workspace, its skills are not available to add.
Use connected repositories to centralize reusable guidance for your team. After you add a skill at the project level, you can assign it to the agents that need it.
## Configuring a Repository for Optimal Agent Performance
Once your repository is connected, you can configure it to ensure agents work optimally with its unique tech stack and requirements. Workspace admins can tailor the agent environment, instructions, and commands for each repository.
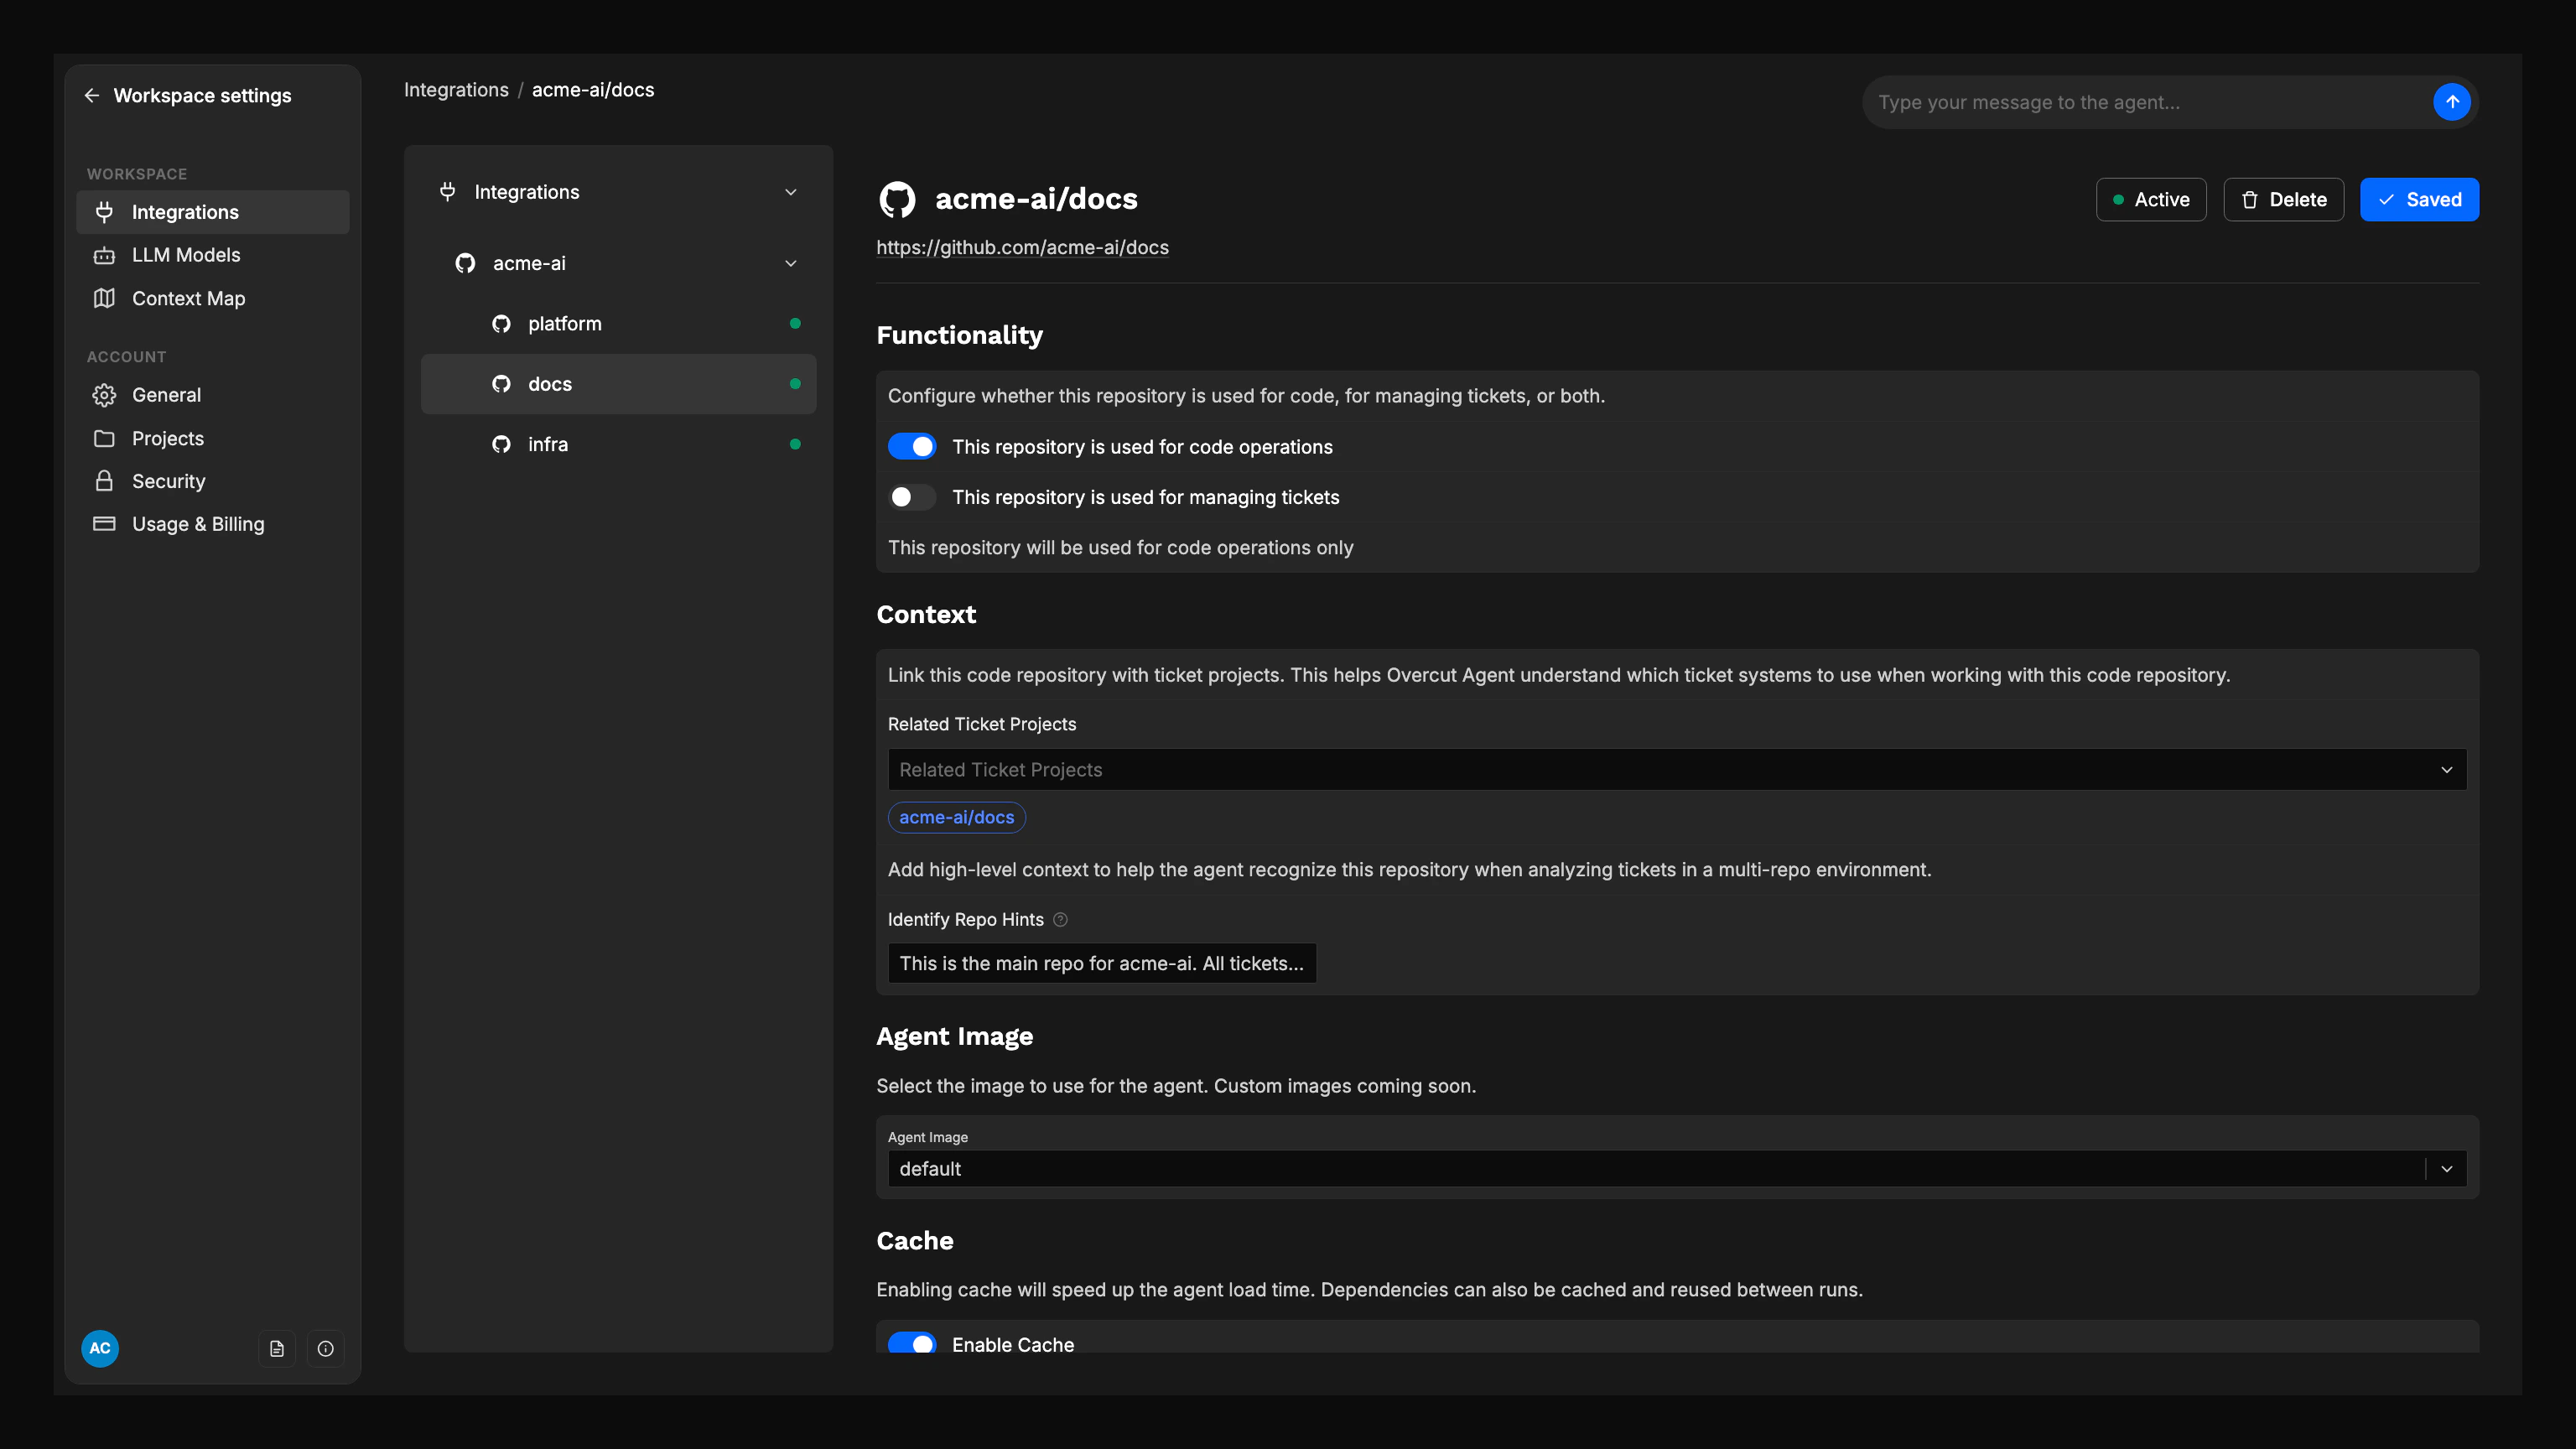 Go to the repository settings in Overcut (usually found under the Integrations or Repositories section).
Choose the repository you want to configure.
Select the container environment agents use for this repository. The **Default Image** suits most stacks, while **Universal 6** provides a newer toolchain for repositories that need more recent language or runtime versions. See [Agent Image](/docs/repositories/agent-image) for the full comparison.
Provide any custom workflow steps, environment setup, or compliance requirements in Markdown or YAML. Examples: pre-commit hooks, build steps, environment setup, or compliance checks. These instructions will be used by agents during automation runs.
Specify repo-specific commands for tasks like install, lint, test, or build. Agents will use these commands to interact with your codebase, ensuring compatibility with your repo's processes.
If your workspace uses ticket repositories, you can link them to related code repositories from the ticket repository page. See [Repository Mapping](/docs/repositories/repository-mapping) for details.
Save your changes to apply the configuration.
## Code Indexing
Code indexing provides agents with an additional semantic search tool to find relevant code context efficiently. When enabled, agents can search for code by meaning rather than just keywords, helping them identify APIs, understand code relationships, and locate relevant files faster.
**Semantic search is optional for agent operation.** Agents can work effectively without code indexing by using standard tools like file search, grep, and glob patterns to navigate the codebase. Code indexing is an enhancement that provides another way to find context, but it is not required.
## Summary
* Overcut only processes events from active, connected repositories.
* Each repo can be configured for optimal agent performance: custom images, instructions, and tools.
* This flexibility ensures automations are reliable, secure, and tailored to each codebase.
## Next Steps
Once you have your repositories configured, you may want to learn about **Repository Mapping & Automatic Identification** to understand how to:
* Link ticket repositories to code repositories
* Use AI-powered repository identification in your workflows
* Automatically select the most relevant repositories for each ticket
Learn more about repository mapping and automatic identification in our Repository Mapping guide.
Go to the repository settings in Overcut (usually found under the Integrations or Repositories section).
Choose the repository you want to configure.
Select the container environment agents use for this repository. The **Default Image** suits most stacks, while **Universal 6** provides a newer toolchain for repositories that need more recent language or runtime versions. See [Agent Image](/docs/repositories/agent-image) for the full comparison.
Provide any custom workflow steps, environment setup, or compliance requirements in Markdown or YAML. Examples: pre-commit hooks, build steps, environment setup, or compliance checks. These instructions will be used by agents during automation runs.
Specify repo-specific commands for tasks like install, lint, test, or build. Agents will use these commands to interact with your codebase, ensuring compatibility with your repo's processes.
If your workspace uses ticket repositories, you can link them to related code repositories from the ticket repository page. See [Repository Mapping](/docs/repositories/repository-mapping) for details.
Save your changes to apply the configuration.
## Code Indexing
Code indexing provides agents with an additional semantic search tool to find relevant code context efficiently. When enabled, agents can search for code by meaning rather than just keywords, helping them identify APIs, understand code relationships, and locate relevant files faster.
**Semantic search is optional for agent operation.** Agents can work effectively without code indexing by using standard tools like file search, grep, and glob patterns to navigate the codebase. Code indexing is an enhancement that provides another way to find context, but it is not required.
## Summary
* Overcut only processes events from active, connected repositories.
* Each repo can be configured for optimal agent performance: custom images, instructions, and tools.
* This flexibility ensures automations are reliable, secure, and tailored to each codebase.
## Next Steps
Once you have your repositories configured, you may want to learn about **Repository Mapping & Automatic Identification** to understand how to:
* Link ticket repositories to code repositories
* Use AI-powered repository identification in your workflows
* Automatically select the most relevant repositories for each ticket
Learn more about repository mapping and automatic identification in our Repository Mapping guide.